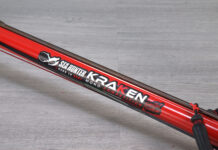



The Cetma Shark Vela is the unbeatable Best Choice by Apnea Passion 2025 awarded speargun in the category demultiplied power. The precision and ease of use of the Shark Vela, together with many clever technical solutions, like one muzzle for all power systems, like single and double bands, and the Vela, made it the real winner. Now Cetma has cleverly launched the Vela Power version, with 16.5 mm diameter bands compared to the 14 mm diameter of the Regular version. A big increase in power that we are eager to test and which will make the Cetma Shark Vela great also for the more demanding and experienced spearos.

The Regular version will still be great for those who wish to have a very easy to load and precise speargun. The Cetma Shark Vela Power is offered complete by Cetma, but also as a kit to upgrade your Shark, be it in the single, double bands or Vela Regular setup. Let’s see all the details and how we can change our power system on the Cetma Shark moving from the double bands to the Vela Power.
Vela setup and kit details
As said, the Cetma Shark Vela Power is set with four 16.5 mm diameter Cetma Magnum Plus elastic bands. On the 72 cm Shark, in our hands, the central rubbers are 15 cm long while the external ones are 18 cm long. These lengths are the same as for the Regular Vela, so the difference, very important, is only the diameter of the bands. For such reason the Vela Power utilizes a 6.75 mm diameter shaft compared to the 6.5 mm solution of the Regular. According to Cetma Composites, the Shark 72 Vela Regular reaches 4 meters of useful length of the shot, while the Power 4.5 meters. We will test and verify the perfomance indicated soon.
From double rubbers to Vela Power
With the very useful Vela Power kit available by Cetma Composites, it is possible to upgrade one’s Shark from single, to double rubber, or even Vela Regular, to the Vela Power. We have chosen to go through the process of upgrading from double rubbers to Vela. The process is easy but care must be taken, so we like to take you through the process, also visible on out Instagram and Facebook pages.
Positioning the hook plate in front of the hilt
The Cetma Shark double rubbers has only two screws inserted in the barrel just in front of the hilt, aimed to closing the holes present to position the hook plate for the Vela. In fact, the screws are complete with plastic gaskets to perfectly seal the holes.

First of all you will need to dismantle the drum of the reel to clear the space to extract the screws and put the new ones in together with the hook plate. To do this it is sufficient to untighten the screw of the reel opposite to the clutch. It is a number 4 Allen screw. Once done that the axle of the reel slides out from the side of the clutch and the drum is free.
The two size 2.5 Allen screws are now visible and can be untightened. The one in the direction of the muzzle is easy, while the one more towards the hilts need to bend slightly the steel structure of the reel for the passage of the line. One done, it is possible to easily remove also the second screw.
The Vela Power kit includes the hook plate and two long screws wich have the same diameter of the ones extracted, but the head is a T20 Torx screw. Position the hook plate with the narrower part in the direction of the muzzle and tighten the two screws. Now you can remount the drum of the reel tightening the Allen screw size 4 taking care to hold the clutch with one hand to avoid it turning during the process. That done, the Vela system if ok for the part near the reel.


Positioning the elastic bands with the lines and the X2 Stainless steel block
Now is the time to position the main part of the Vela Power kit, which is the 4 x 16.5 mm diameter elastic bands, connected to the X2 steel block and its two wheels, and the SK75 2mm cords. The very important thing is to position the X2 steel block with the bolts facing externally to the barrel, as this will avoid them rubbing on the barrel surface. Once done that, it is time to work on the muzzle.
Dismantling the double bands from the muzzle.
A pair of double balds is connected to the muzzle with the line going inside two pass through holes in the muzzle itself. To free the two bands the lines must be cut with a pair of good scissors. The second pair of rubber bands is connected to the plastic wheels of the muzzle, which in this case have the function of reducing the shock and recoil when the rubber bands launch themselves over the muzzle after the shot. To free this pair of rubbers the wheels must be taken out, and this is done sliding out the central steel axle. This is kept in position by two lateral screws of the T20 Torx type. It is sufficient to unscrew one of the two and then extract the steel axle. You can use a Torx T40 to push the axle out also using a small hammer. Tap on the T40 delicately just to help the axle come out in the first part. After, you should be able to pull it out simply using your hands.

Once the axle is out, the two wheels are free. Take care and check for the presence of a rubber tube on the axle, which will of course come off extracting the axle from its housing. Keep the rubber tube and remember to reposition it in place when remounting.

Positioning the Vela Power kit
You can now position the Vela Power kit, with the side of the two wishbones towards the plastic plate that you have mounted in front of the reel. The other end of the kit has the wheels and the lines, which you will position towards the muzzle. Take care to position the X2 Block, made of the steel structure plus the two small wheels, with the bolts facing externally, meaning the opposite side of the barrel. This will avoid the bolts rubbing and scratching the barrel surface.

The next step is to position the wishbone passing inside the muzzle. The kit should have the wishbone open on one side. Insert one part of the line in one of the holes where the wheels where postioned before dismanteling them. Insert the other part in the other hole. It will be a little hard to press the knots of the line inside the holes, so help yourself with a flat screwdriver. Once both lines are inserted, one per hole, connect them closing the whishbone. The knot is the traditional one where you pass the line inside the loop, then turn it around intself twice and reinsert the line inside the two circles made. Thighten and the wishbone is closed and strong.


Now take the other two lines, the ones with a knot each at the tip. Insert them in the inferior part of the muzzle, in the central groove. Keep the lines well down inside the passage. You can help yourself push them down using the screwdriver. Now you can reposition the two wheels on the muzzle.

Take care to keep the line of the wishbone toward the tip of the muzzle and then position the wheels.

Insert the steel axle on one side and make it gently pass through the first wheel. Then position the rubber tube just on top of the two central lines. Continue gently pressing the axle so it is inserted inside the rubber tube.


Continue so it also penetrates the second wheel and the second lateral hole of the muzzle. Do all this process gently without forcing. Now you can lock the axle buy screwing back the T20 Torx screw.

You can pull the inferior central lines until the knots scroll down insde the muzzle and are locked on the axle and rubber tube. You can position the two wishbones connecting them to the base in front of the reel. Now the Cetma Shark 72 has its Vela Power kit well mounted. It is simply time to try it out in all its power. We will soon publish our Test of the Champion for you.